
[vc_row][vc_column][vc_column_text]
How to Replace Kitchen Cabinet Hinges
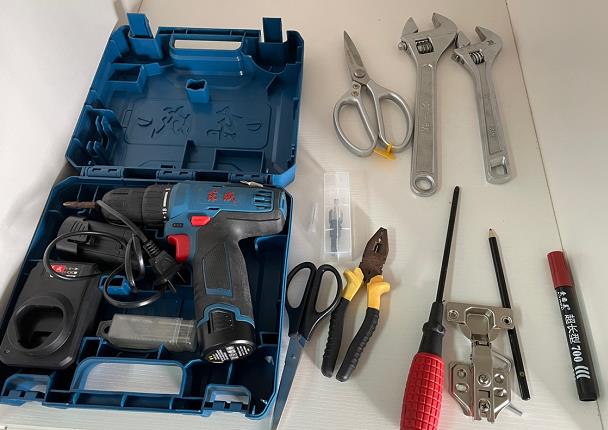
Here are few steps to take when replacing cabinet hinges. It is essential to know the right steps because it can save money. The process of replacing the hinges is easy, provided the right tools are available. Sometimes the hinges can become loose because they were not installed properly. Following the right steps solves the problem of getting the hinges replaced within a short period. Ensure the replacement of hinges meet the required specifications. For example, some hinges are built to fit certain cabinet doors. Avoid stress by getting the perfect cabinet hinges that can work well for a given setup. Some of the tools required to install the cabinet hinges include screwdrivers, new hinges, and screws. Some of the steps that can be followed on how to replace cabinet hinges are:
 1. Unscrewing the release screw
 1. Unscrewing the release screw
The first step to take is to unscrew the release screw and remove the door completely. Start with the bottom hinge, then proceed to remove the top hinge. Someone can help in holding the door into place to avoid cases where it can become loose. After removing the release screw, remove the hinge receiver as well. The process should be done carefully to avoid damaging the cabinet wall. Taking simple steps to remove the hinges is crucial. Sometimes the hinges may have been damaged, but the receiver hinge is not damaged. Remove the damaged part and reuse the rest of the assembly in case it is in good condition.
To remove the hinge receiver, check the inside part of the cabinet and unscrew it. The process will take few minutes to get the screw removed.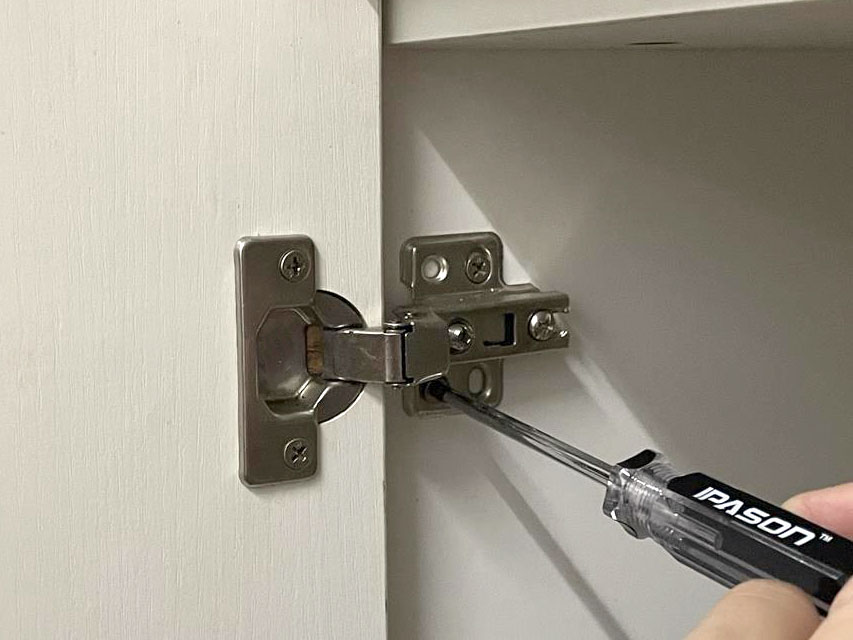
2. Removing the door
After unscrewing the hinges, the next step to take is to remove the door. Remember to replace the hinges; the door should be removed. Some assemblies simplify the door removal process. Check out the assembly and ensure the hinges are removed from the door. Some fixtures come with a quick assembly design. The quick-release mechanism can be applied to remove the door. Always pay attention to the way the door is handled. Avoid cases where the door will be damaged when removing it from the cabinet assembly. Some doors come in materials that can develop scratches. Ensure it is carefully handled to avoid incidences where the quality of the door will be damaged after removing the assembly.
3. Removing broken hinges
The broken hinges are still attached to the door. If they were broken, then the next step will involve removing them from the door. There are some cases where the hinges may be still in working condition, but they have been bent. Unscrew the hinges, then remove them from the door. Broken hinges can make the door difficult to operate. Remove them carefully and check for possible causes for the breakages. Maybe the door is not well aligned, causing the hinges to break. Get to correct the possible cause of the hinges breaking to make them start working again. The process of replacing cabinet hinges will not be complete without fixing the main cause of the hinges breaking. Get to know the reason, then apply the right fix to make the doors work perfectly after the replacement process.
4. Mark where the new hinges will be installed
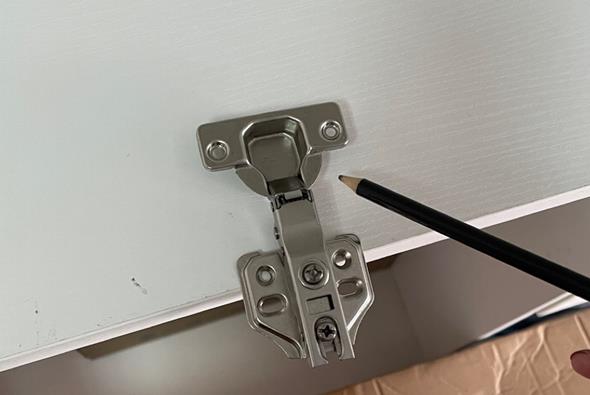
The location where the old hinges were installed may have developed wide screw holes. To make the new hinges hold the door in position, mark positions for the new hinges. Try to offset the new hinge holes from where the old hinges were placed. It is an effective way to get the hinges in position when installing the door. Use a pencil to draw lines where the new hinges will be installed. A slight offset is essential to allow the screw holes to hold the door in position well. The process can take few seconds but ensure the holes are well marked to get the job done perfectly. Get a ruler and a pencil to precisely install the holes to make the cabinet door stay strong.
5. Boring new hinge holes
After marking the new hinges’ location, now it is time to bore the new hinge holes. Use a boring hinge drill to get the holes. There are different sizes of drills. Choose a drill bit that is the same size as the hinge screes. Drilling too big or small holes can make the door lose and hard to get the perfect alignment. Be careful not to bore through the cabinet door. The hinges holes should be deep enough, but they should not bore through the cabinet door because they can damage it.
6. Screwing new hinges into position
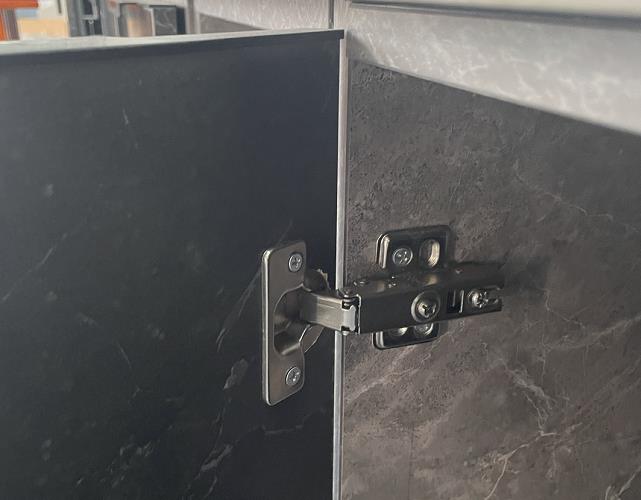
After the hinge holes have been drilled, the final step is to screw the new hinges into position. Use the right short screws to screw the hinges into the door fast, then place the doors against the cabinet to screw it into position. Reattach the hinge receivers and slide the door into place. Check to ensure the door has fitted into position well. Tighten few screws and note how the door operates. It should open and close easily when well-aligned.
7. Reattaching the door
Start by reattaching the top hinge by tightening the release screw. Ensure the hinge is held in the right position before screwing the hinge receiver. The hinge receiver is located on the inner side of the cabinet wall. Adjust the door and ensure it swings correctly before tightening the screws fully. Use the adjustment screws to align the door position when closed. The door should form a nice fit to achieve the perfect installation. Test the door to ensure it opens smoothly to avoid cases where it will be damaged later due to improper fitting.
The steps may easily solve your question of how to replace cabinet hinges. Follow the steps, and it will be easy to replace the hinges on the cabinet door. There are different cabinet door hinges; get high-quality hinges that can easily fit into a position to get the perfect fit. It is easy to save money through a DIY approach. Save money through applying the tips.[/vc_column_text][/vc_column][/vc_row][vc_row][vc_column][vc_column_text]
RELATED PRODUCTS
[/vc_column_text][/vc_column][/vc_row][vc_row][vc_column][products columns=”3″ orderby=”title” order=”” ids=”7356, 11256, 16872″][/vc_column][/vc_row]