
I think that the number of companies whose working style is shifting to telework is increasing this year due to the influence of the COVID-19.
Since I usually go to my desk for a long time and work on my PC,
I strongly felt that the burden on my body would increase day by day .
I feel sick if I keep doing this … I thought so, so I bought the electric standing desk “Venace“.
I tried build a standing desk, DIY desk frame for the first time this time and managed to complete it! —— To custom standing desk!
I hope this standing desk plans will be helpful for those who are considering purchasing Venace or who are thinking of custom adjustable desk. I think this will be a good guide for how to build a standing desk.
The content of this article:
1.Required items
- Electric Desk Frame “Venace”
- Top plate glulam
- Watco Oil Natural Brush
- Sandpaper
- Xiaomi cordless electric screwdriver
2.Table Top plate
- For a beautiful smooth top plate with sandpaper
- Painted with Watco oil
- Watco oil painting: 2nd time
3.Venace Desk base edition
4.Complete
- Custom standing desk
5.Summary of this article
1.Required items
Electric standing desk base “Venace”
I bought the electric desk legs of Venace, the DIY desk frame, which can be the most important item of this diy adjustable standing desk. There are many types of Venace in all, and this time “Venace dual motor 3 stages standing desk frame” is selected.
It seems that you can choose the table top or panel type depending on how you purchase it. This time I bought only the legs for the table top and DIY!
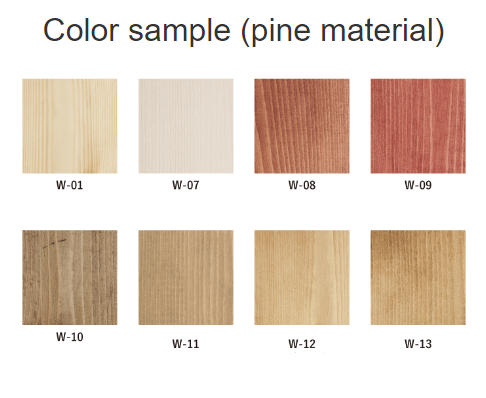
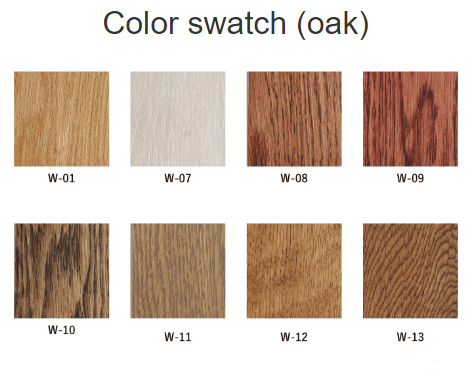
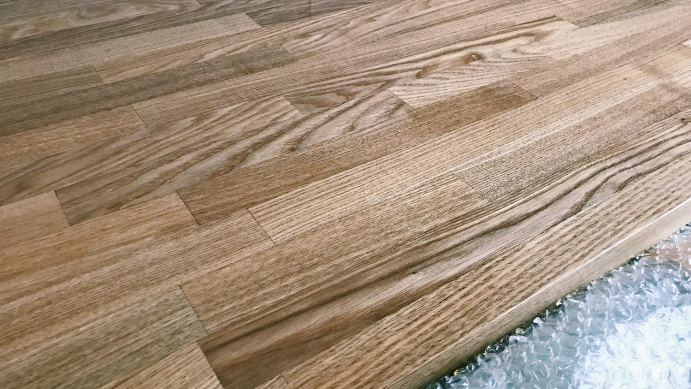
Top plate glulam
The top plate purchased this time is glulam.
I didn’t have a home improvement store around me, so I bought it online at the Marutoku shop this time! The Marutoku shop has various types such as maple and walnut, so it was really helpful when purchasing.
This is the reason why I chose Tamo wood.
- Electric Desk Frame “Venace”
- Top plate glulam
- Watco Oil Natural Brush
- Sandpaper
- Xiaomi cordless electric screwdriver
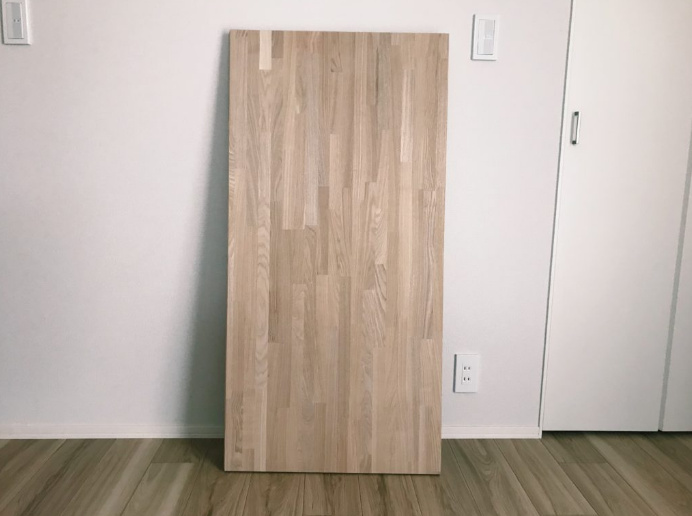
This time, I bought a table top plate size of 1200mm x 600mm x 30mm according to the space of the room.
At the Marutoku shop, you can cut it in millimeter size, so you can adjust it neatly according to your own space.
The front of the top plate this time was slightly tilted and cut .
In addition, you can make various orders such as circular holes for cables and diagonal cuts at the corners, so you can create your own original top plate.
The contents of this purchase are like this.
| wood | Tamo accumulation material free cut |
|---|---|
| size | 1200mm (width) x 600mm (length) x 30mm (width) |
| processing | Surface [A]: M surface (1: surface) + Polished |
| processing | surface [B]: Thread surface + Polished |
| processing | surface [C]: Thread surface + Polished |
| processing | surface [D]: Thread surface + Polished |
| Amount of money | $117 |
| Arrival days | About 7 days |
It was great to be able to purchase the ideal top plate safely! If you don’t want to DIY your table top, I suggest you can go Ikea and shop a table top. It is a convenient and fast way.
Watco Oil Natural Brush
Next, I bought the oil and brush needed to paint the table top plate.
You can check the finish from the official Watco Oil website, so it’s a good idea to compare it with your ideal color when purchasing.
The brush was the right size for Amazon’s purchase, so I bought it all at once. As a result, this purchase was the correct answer and I was able to DIY well!
Sandpaper
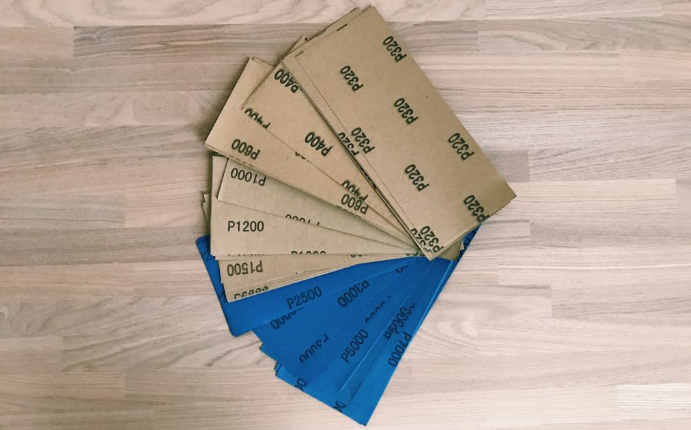
Aewio sandpaper.
# 320 # 400 # 600 # 800 # 1000 # 1200 # 1500 # 2000 # 2500 # 3000 # 5000 # 7000 12 types and 4 each.
The table top I bought at the Marutoku shop this time was not polished, so I had to finish it myself.
If I bought it anyway, I bought 48 sheets of 12 types and abundant Aewio sandpaper.
It is a convenient item because it can be used not only this time but also for other purposes such as removing rust!
Xiaomi cordless electric screwdriver
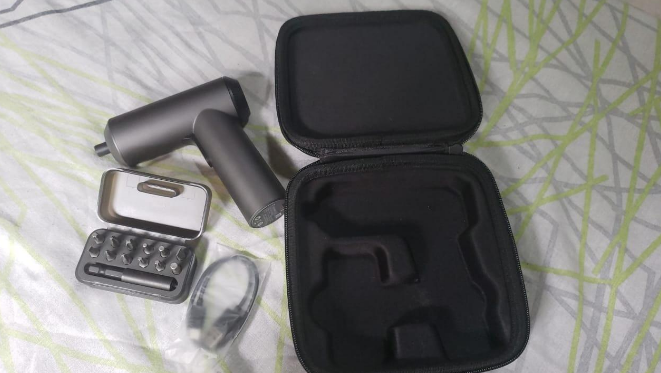
A minimal electric screwdriver like “Da * son”.
I’ve never seen such a simple and cool driver. The height of the point of Type-C charging with matte coloring based on black!
It was easy to use and was overwhelmingly easy to use.
The last is Xiaomi’s cordless electric screwdriver.
2.Wood Table Top
When the wood table top arrived from the Marutoku shop, it was neatly wrapped in cardboard with cushioning material like this. It is unveiled by peeling it off cleanly so as not to damage it.
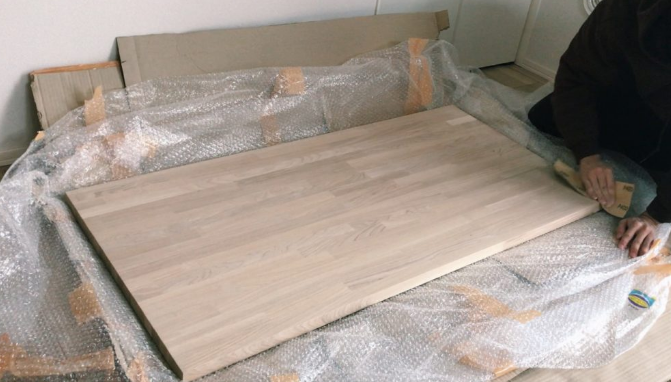
For a beautiful smooth top plate with sandpaper
Polish it cleanly with Aewio sandpaper .
This time, I polished it in 4 steps of # 320 → # 400 → # 600 → # 800.
Even up to # 400 will give a smooth finish, but I was worried about a little roughness, so I polished it up to # 800. Thanks to that, it became a beautiful smooth top plate!
Painted with Watco oil
Watco oil has a small spout, so transfer it to a container such as a paper cup before you start painting! I used a 50mm type.
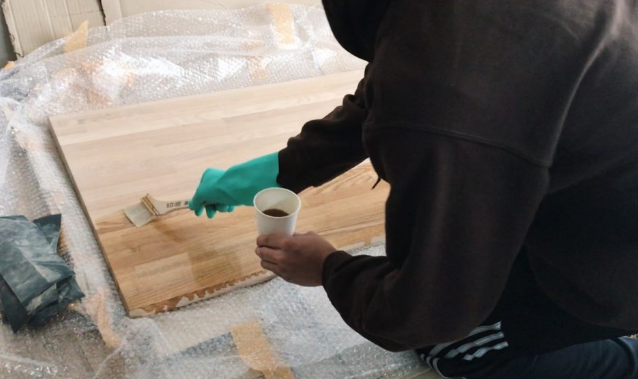
Apply it neatly so that there is no unevenness.
My personal trick is to “paint a straight line from end to end in one go !”
If you apply them separately, unevenness will occur at the seams, so it is recommended to apply enough oil at once!
Once applied, leave it for about 20 minutes to wipe off the oil that has floated once.
Then leave it for about an hour to dry.
Watco oil painting: 2nd time
After leaving it for 1 hour, apply it twice.
When you have finished applying it, polish it again with a file (# 800 only).
Wipe once again oil after the lapse about 20 minutes a day round will continue dried!
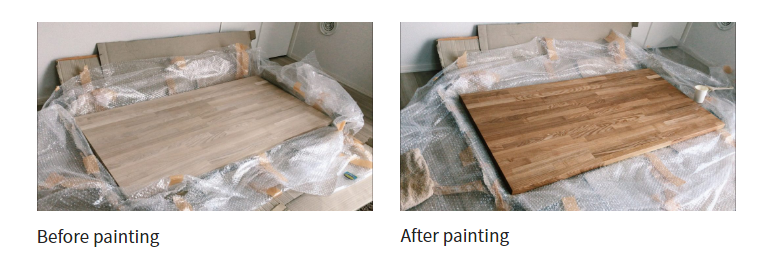
The colors before and after painting look like this.
A beautiful wood grain has emerged and it is becoming a more tasty top plate!
3. Venace Desk base edition
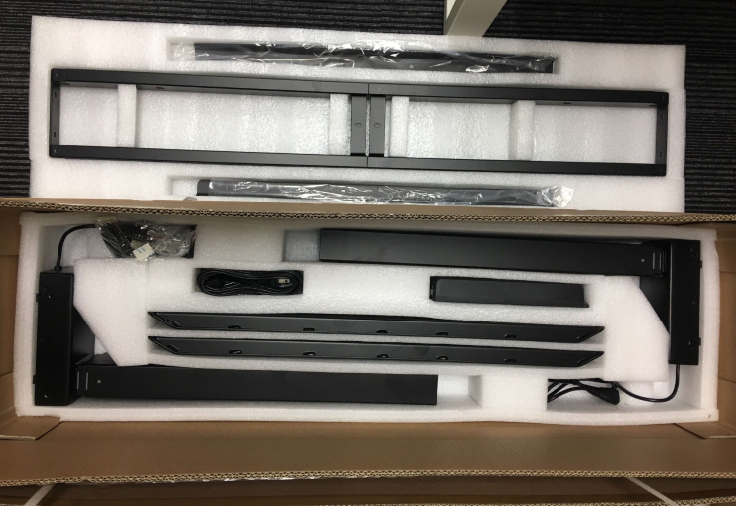
Next, we will assemble the Venace Standing desk frame of the main body!
The parts of Frame look like this.
I will assemble it crisply according to the instructions!
First, attach your feet to the central beam component.
The basic size of the beam is 1075mm, so it was perfect for the size of the top plate this time. So I decided to install the beam as it is without extending it.
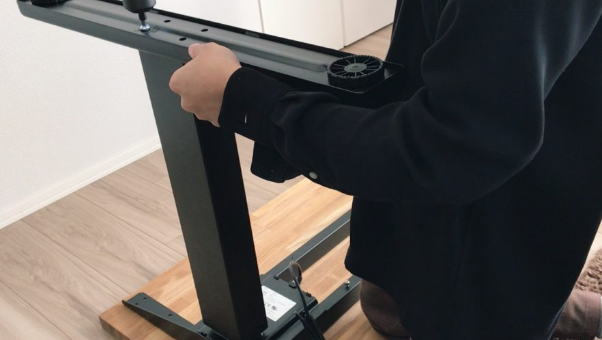
Next, attach the support plate that supports the wooden table top.
There is also an attached hex wrench, but it is more convenient to have an electric impact driver!
I will attach the foot part.
We are preparing to lay a top plate that has been dried for one day below this area and install it.
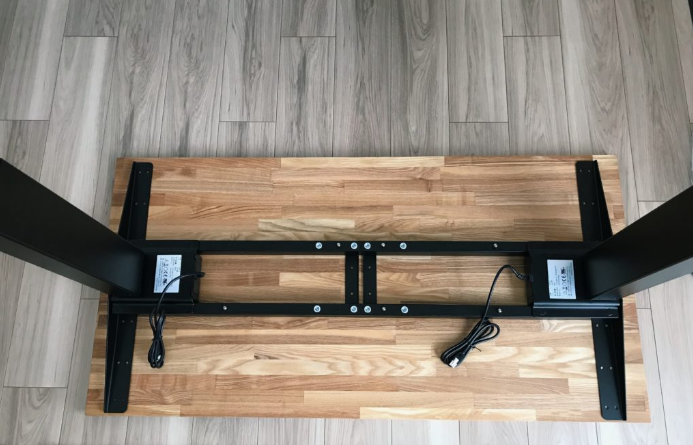
Venace is 1075mm on the 1200mm table top, so it fits just right.
If you make your own top plate, you definitely need an impact driver, so we recommend that you prepare it when assembling!
Set all the cables on the controller and then attach the cover. The cover can be easily closed by hand, so keep the cords neat.
At the end, attach the control panel to the desired position and you’re done!
I installed it on the left side.
I was able to assemble it in about an hour in total!
4.Complete
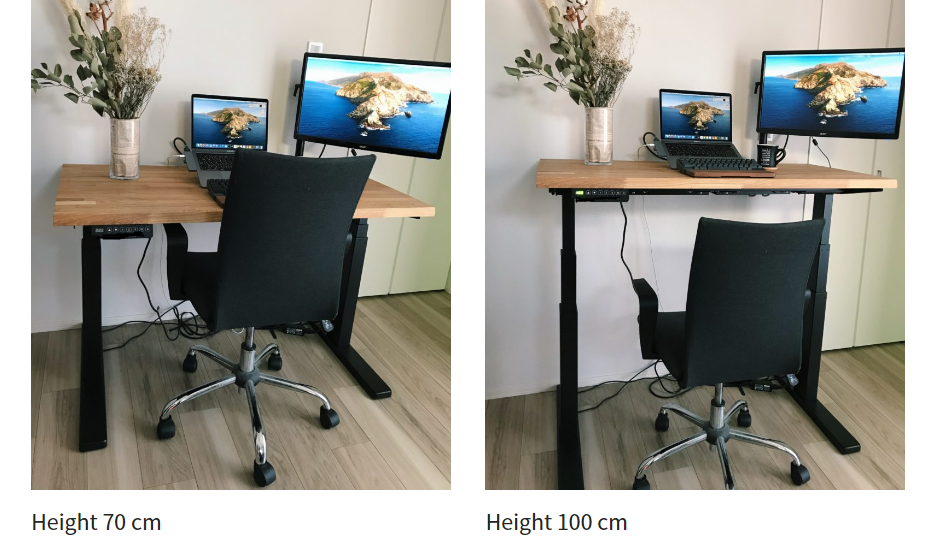
I set “1: 70cm” and “2: 110cm” to the buttons on the control panel. It’s really convenient because you can easily raise and lower it at any time.
Electric stand up desk is an item that makes my life more comfortable. The height that can be adjusted seems to be useful not only for physical condition but also for switching feelings and sharpening work .
Summary
This time, I was able to get the long-sought Better Life!
I was very nervous and anxious because it was my first DIY, but I was able to make it well by referring to other people’s assembly.
It was my first time to get an electric screwdriver, but my first DIY standing desk was a very satisfying result!
From now on, I decided to DIY not only custom standing desk but also other items.
If you are interested in custom adjustable desk or desk DIY, please refer to it and leave your comment.