

What You Need to Know Before Painting Cabinets
Having work done in your kitchen isn’t just expensive, it’s also a hassle. The best, most professional contactors often have full schedules, meaning that you’ll have to adjust to their available times for getting work done. This can mean that your normally calm, private time at home is interrupted by loud sanding, lots of entering and exiting the house, and a long stretch of time where your kitchen is unusable due to drying paint.
Painting your cabinets yourself is a great way to ensure it’s done on your terms, schedule, and budget. With full control over every step of the process, you’ll be able to adjust the project to minimize any interference with your lifestyle. Here’s a step-by-step guide that will go over everything you need to know about how to paint kitchen cabinets.
Planning the Project
The adage “measure twice, cut once” applies extra when it comes to painting. Before you begin, figure out what your cabinets are made out of and carefully measure all of the surfaces you need to paint. Pay attention to sections with three-dimensional details, the insides of doors, shelves, and any other sections of the cabinet that you want to recolor. After you’ve measured, give yourself a healthy amount of breathing room and round up. You’ve now got a number that you can use to figure out how much paint to buy.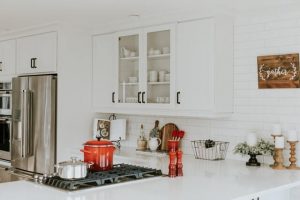
How Much Does It Cost To Paint Kitchen Cabinets?
Comparisons need numbers. If you’re looking at how much to paint kitchen cabinets yourself versus the cost of a contractor, you’ll want to take the information you’ve gathered above and do some basic math. First, find a paint that’s the color you want that will adhere to your cabinets. Next, figure out how much of that paint you’ll need to buy to cover the amount of surface area you want to paint. Repeat this same step for a primer, paying special attention in order to choose a primer that’s compatible with your cabinet surface and the paint you’re using. If you’re planning on skipping sanding, you’ll likely want a special primer that will help the paint bond to your cabinets, which can be more expensive. Finally, make a list of the materials you’ll use for the project. You’ll need plenty of masking tape, some plastic sheeting or other material to cover things like counters, a paint roller, a brush, a pan to transfer paint to the roller, and probably some sandpaper. Some other things that you might not have include a screwdriver for disassembling cabinets and a stool to help you reach high places.
The cost of painting will vary a lot based on the paint you choose, the surface of your cabinets, and how many of the additional supplies you need to buy rather than find around the house. This means for some people, painting yourself will be much more inexpensive than it is for others. In general, however, you can expect to save about half of the cost of having someone paint your cabinets professionally.
Starting Out: Basic Preparation
The first step to painting your cabinets is to prepare the area. Start by removing doors, drawers, and things like handles and other pieces of hardware from your cabinets. If you can’t remove something and you don’t want to paint it, tape it up to preserve its finish. Many people will change out handles and other bits of hardware on their cabinets as they paint, so consider starting that process with this step.
Next, thoroughly clean your cabinets. You’ll want to quickly skim the paint and primer you purchased to see if there are any cleaning chemicals to avoid. Some paints won’t adhere well if you use TSP or other household cleaners. In the absence of any such instruction, TSP products should probably be your go-to, as they help remove chemicals from old paint that might impede your new paint’s ability to stick.
The final step in basic preparation is to sand your cabinets. Sanding your cabinets creates a rough surface that your new paint can stick to. Start at the spots that are hardest to reach and then move on to wide, flat surfaces. Your goal is to roughen things up a little bit, so don’t worry about getting things ‘perfect.’
Finally, give your cabinets a final clean to remove dust and grit left from sanding. After that, make sure you’ve got tape and sheeting covering the parts of your kitchen that you want to keep clean. You’re ready to prime!
How To Paint Kitchen Cabinets Without Sanding
If you’d like to skip the final step above, there are a few routes you can take. The first is the easiest, by far: simply choose a combination of paint and primer that will adhere to your cabinets without sanding. Wooden cabinets usually don’t need any special preparation. For other cabinets, especially those with smooth veneer or laminate surfaces, you’ll want a bonding primer and a type of paint that will stick to it.
If you’re not happy with bonding primers, consider liquid sander or special paint. Chalk and mineral paints can stick to just about anything, while liquid sander is a chemical solution that roughens surfaces it’s applied to. Be sure to carefully read the directions on anything you buy and test a small patch first. These options usually work, but it’s best to figure out any problems with your painting process with a test patch instead of realizing your paint won’t do what you want after you’ve painted your whole kitchen.
Priming and Painting
Experts suggest applying two thin coats of primer, letting each one dry fully. Simply take a roller and cover the whole surface with a thin layer of primer and let it sit for however long it says on the can. If your cupboards are extra smooth, you’ll probably want to give them another light sand after your second coat of primer.
As for painting, be sure to stir the paint thoroughly before you apply it to your brush or roller. Go back and forth to ensure that you get paint on both sides of the grain. Just like with primer, using more than one thin layer of paint is the key to success here. The last thing you want is for gloopy paint that runs down your cupboards and forms drops as it dries. Let each layer dry fully before you add the next, and consider using sandpaper to remove any excess paint between layers in order to have a perfectly smooth, even finish.
Reattach And Clean
The final step is to return your kitchen to normalcy. Pull up your tape and sheeting, screw your doors and handles back in, and you’re all set! If you purchased new handles or hardware to go with your new paint, this is a perfect time to install them. Be sure to give your new cupboards a quick wipe down to remove any debris that may have settled into them during the painting process.