
A Better Kitchen Life! Build Pull Out Under Sink Storage Trays for Your Kitchen
August 20, 2021
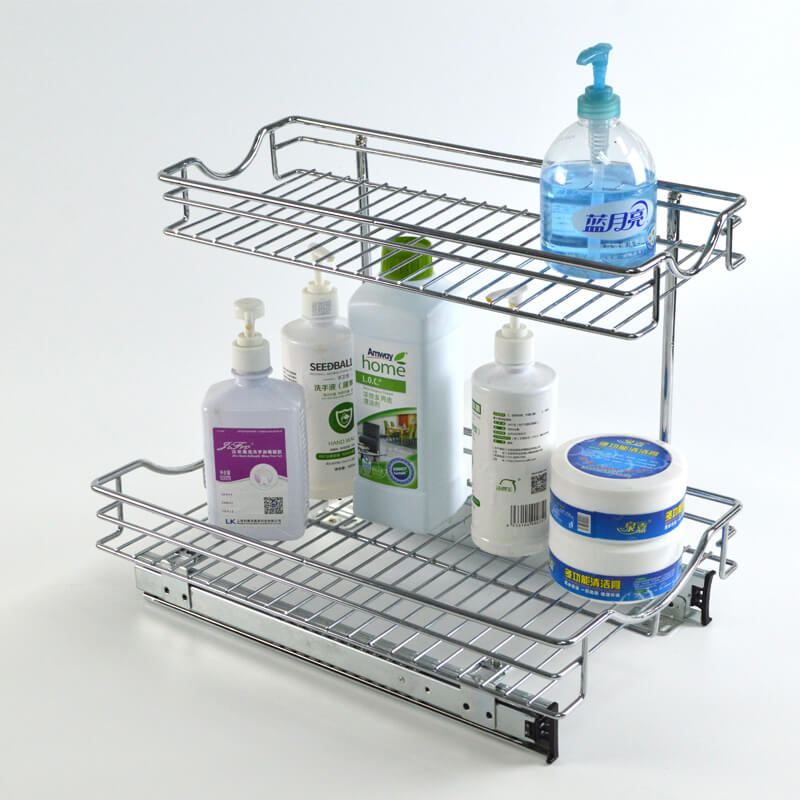
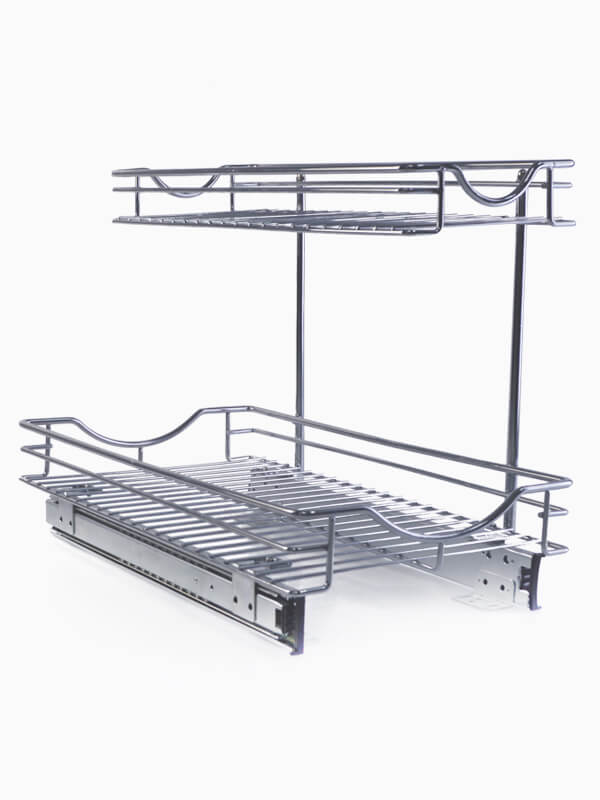
The cabinet beneath my kitchen sink would be the most chaotic area in the house if I had to pick one. Why? Because it’s a small area, to begin with, adding a huge pipe in the middle makes things much more difficult to work around. When you add in all of the things we need to keep in there, it’s virtually difficult to keep track of. Have you had it with that dingy, I’m-not-sure-what-it-holds storage area behind the kitchen sink? These two roll-out trays, which are placed on seamless ball-bearing cabinet glides, will pull everything out into the open and enable you to find whatever you need fast.
The good news is that there are surprise organizers like us who are meant to handle this exact problem, so there’s still hope for order, no matter how large or little your kitchen sink cabinet is. It’s all about coming up with new methods to store things, and these brilliant gadgets could just transform your life-or at the very least make it a little simpler. These are all the under-sink organizers that everyone needs, from adjustable shelves to pull-out trays.
It’s all about inventing new ways to keep stuff, and these ingenious devices may just change your life-or at the very least make it easier. From adjustable shelves to pull-out trays, these are all the under-sink organizers you’ll ever need. This DIY for under-the-sink storage is simple. There are no miter joints at all. All of the pieces are bonded together before being hammered or screwed together. For as low as $75, you can create all of the trays in an afternoon using building supplies from our company. Everything can be built using basic carpentry equipment and careful measurement. A table saw isn’t required for this, but this will help you obtain more exact measurements, notably for the bottom tray bases, in which the ball-bearing drawer slides demand accuracy.
Tools and material required to pull out under Sink Storage Trays
You’ll need a lot of tools to make roll-out trays, including an air compressor, an air, a Brad nail gun, a circle saw, clamps, a combo square, a portable drill, a countersink drill bit, a framing square, and a paintbrush. Safety glasses are required. Measure with a tape measure Along with supplies such as 1-5/8 “screws for wood, a half “hardwood board, 2′ x 2′, Maple 1×4 x 16′, maple 1×6 x 2′, 20 “cabinet glides with ball bearings, a third “hardwood plywood, 4′ x 8′, Nails with a 6d finish, Adhesive for construction, Glue for woodworkers.
You can get every supply here. Then, look for hardwood plywood at a home center or a lumberyard. Instead of buying a complete sheet, 2 x 4-ft. portions are frequently available. Hardwood plywood is finer and flatter than exterior-grade fir plywood and has two nice sides.
The most effective under-sink storage option
You may have a large garbage disposal that prevents you from installing both top slide-out trays. If that’s the case, just prepare one tray. You’ll probably have to adjust the project measurements to match your area to measure your sink base and custom-size and construct the wood trays.
Then follow the measurement and assembly directions steps.
Measure the cabinet opening
If the gap between both the entryways is narrower than the gap between both ends of the frame, use the lesser dimension to create the base.
To ensure that the trays move smoothly, make sure the base and tray pieces are square and precise. Check the size of your kitchen base cabinet inside the frame before you begin creating this under-sink pull-out storage solution.
Mark the Base
Make sure the center divider is in the precise centerline; this will help make the two trays the same size.
Before driving screws, drill pilot holes
Cut pilot holes in the divisions, and glue them to the base and secure them with No. 8 x 2-in nails.
Measure the distance between the divisions
Measure the distance between the divisions to the nearest millimeter. To accommodate the glides, make the tray’s outside dimension 1 inch smaller than this size.
Secure the edges to the tray frame firmly
Cut out the trays’ pieces and glue or nail them together. To maintain the trays square, cut the bases completely square.
Align the sliding edges with the partition’s face
Place the drawer glides on 3/4-inch spacers to keep them flush and the front of the cabinet. When opening the divisions to disclose the holes, attach them to the divisions.
The tray front must be flush with the glide
Take the glides’ inner parts and attach them to the trays’ sides. Reconstruct the glides and check for smooth operation.
The ball-bearing glides are intended to be mounted on the trays’ sides (Photos 6 and 7). To function properly, the glides require precisely 1/2 inch of room between both the partition and the drawer on each side, therefore make the trays exactly 1 inch narrower than the partitions. When mounting the bottom or top trays, keep an eye out for protruding hinges and other obstacles. To fit them, you may need to alter the height or positioning of the trays.
Within the cabinet, position the base assembly
Place the bottom assembly on the cabinet’s floor. The base’s top must be flush only with the face frame’s back. Using screws, secure the base to the cabinet’s floor.
Make and install the higher trays
Two glides on one side are used to mount the upper trays. Mark the glide areas with the jig. Unlike the lower trays, the central holes of the glide are aligned with the marks drawn along the jig in this manner.
Glides and cleats should be mounted on the inside
Center the glides’ mounting holes and sand the cabinet’s sides to improve adhesion, then glue and attach the cleats to the cabinet’s edges.
Check the fit and use polyurethane to seal the trays
Test the fit by sliding the top trays into place. To keep cleaning easier, apply two layers of polyurethane to the trays.
To not leak under the sink, seal the wood because you never know. Once you finish then only remove the trays and glides. Only the trays and slides should be removed once you’ve finished. Finally, will build pull out under sink storage trays for your kitchen which will eventually make a better kitchen Life!