

The Ultimate Guide to Furniture Restoration
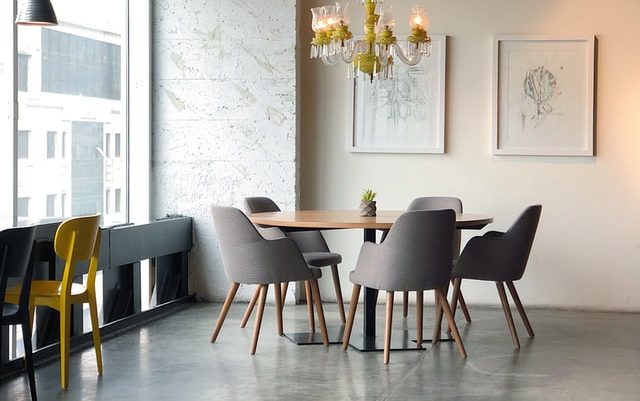
Yet antique furniture remodeling takes time, it isn’t that challenging given that you have gone through the procedures on a step-by-step basis. In fact, with the appropriate product and tool, you can rest assured to get quickly and rewarded what you hoped for. Before you can make any step further, here are some simple and easy steps you can follow to restore your furniture. You’ll be in a better position to breathe a new life into your furniture. Here’s a guide to furniture restoration.
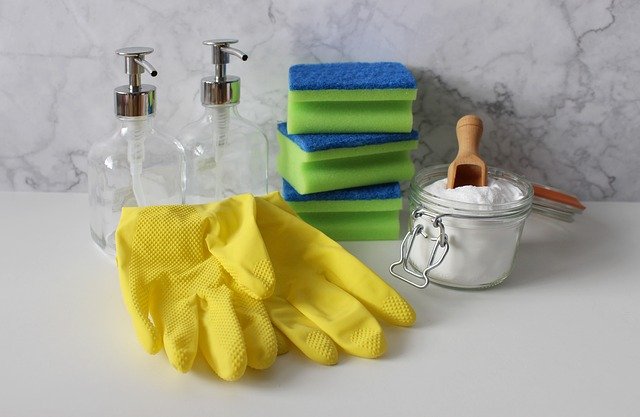
1. Safety First
Before you can take any step further, check your safety first. Remember that the restoration process will entail the use of tools and chemicals that may endanger your life. First off, you need to use the right tool for the purpose; this does not only keep your family safe but also makes the job easier. So for that case, you should put on protective apparel, including; eyewear to ensure chemicals do not splatter and burning, rubber gloves, and long sleeves for full protection.
Besides, you should work in a ventilated place – in most cases outdoors – to prevent breathing in poisonous vapors. Also, ensure to store oily rags by the guidelines stipulated on the package of the solvent you are using to ensure your home is safe from fumes and combustions. Even better, take care of the initial paint finishes that may have lead. In that regard, if you doubt whether or not your furniture piece has a lead paint constituent, then you ought to use a proper ventilator when removing this material or rather send it to an expert to handle the task.
2. Identification of an Old Finish
Before restoring antique furniture, you need to determine the contemporary finish present on the wood. For instance, varnish, lacquer, and shellac are tough to identify by just seeing alone and may need some further experimentation. So, first off, you need to test the wood surface by putting alcohol in a discreet area. In case the finish strips off with the alcohol in need, it’s shellac. On the other hand, if it only takes thinner lacquer to clear the finish, then it is lacquer. Better still, if it is none of these products works, then you may be working on a varnish.
Other pigmented finishes such as enamel or paint are quite easier to identify. Besides, some other finishes like wax, sealer or oil can be known because it doesn’t give a shine on the surface.
3.Cleaning
The next step you need to follow of furniture restoration is cleaning the furniture. Did you know that with a simple cleaning, you can restore your old furniture to a new wonderful piece? This option in question is used for scrubbing up rattan, wicker, or wood surfaces.
In handling this process, you need to use a commercial oil-based cleaner to penetrate the layers of wax and dirt on the piece. If you find out that the wood cleaner alone does not restore your furniture, opt for a solution of liquid detergent and warm water. Use a cloth to apply the mixture, while being cautious to ensure the wood doesn’t become too wet. Thereafter, rinse the place properly, and make it dry using a soft and very clean cloth to ensure water does not cause damage to the wood.
If none of these options brings your furniture to new good like as you intended, you might require to go for a solvent cleaning to do the job. Such solvent might be denatured alcohol, turpentine, or mineral spirits. When handling these substances, it is advisable to do it in an outdoor space, or a well-ventilated space. Also, when applying the substance, use a burlap bag, or an old towel and also wipe dry it. It is recommended that you wipe it instantly. After an extraneous cleaning, use a commercial cleaner onto the surface and smear the wood slowly and gentle using a separate clean cloth.
4. Reamalgamation
The next step of furniture restoration comes to reamalgamation. The final finishes can develop cracks and scratches that can make your wood surface look dull and add a crackling result to the piece. However, to correct this problem, you’ll need to use a process named reamalgamation – a process that uses a liquid that is applied to remove the imperfections. The first thing you want to do is cleaning the surface using either of the aforementioned techniques. Then you need to select a solvent; lacquer thinner for lacquer or alcohol for shellac. Varnish however can’t be reamulgamated.
When applying the solvent to the surface, ensure to use a bristle brush and work swiftly without leaving the brush to become too dry. While the solvent dries, it’ll appear shiny at first and then tone down to a finish, but leaving out no cracks nor scratches. Polish the area gently using steel wool in mono-direction as the wood grain. Finally to put additional shine, apply hard paste wax.
5. Stripping
Before you can mark the job as done, you must strip the old finish to give room for a new look. Additional layers of colorant will need a stronger stripping formula, such as a semi-paste on the surface to unlatch the previous coats for removal. Working from the upper side to the lower side, put the stripper literally in one direction, topping more to areas that are carved where the coating will be tougher to remove. Wait between 5 and 20 minutes, determined by the thickness of the coating, and finally start removing the coating on the surface using a stripping tool like a putty knife. Wait for a while because it may consume more of the applications before the removal of the finish.
6. Refinishing
After all this, it final and fun part of furniture restoration is putting a new coat finish and stain for a different and unique look to your furniture. However, before starting this step, do any essential furniture repair like filling in cracks or repairing broken chair seats. Sand the unit with 120 grit sandpaper, and thereafter use a tack cloth and vacuum to clean the surface.
Use a bristle brush to put the stain, and leave it on for over 5 minutes before clearing the extra off using a clean cloth.
Conclusion
Remodeling old furniture is a pleasing thing that can make your home look different altogether. Whether you have a dresser, or sofa that needs a wake-up call, the steps we have given you will offer you just that.