
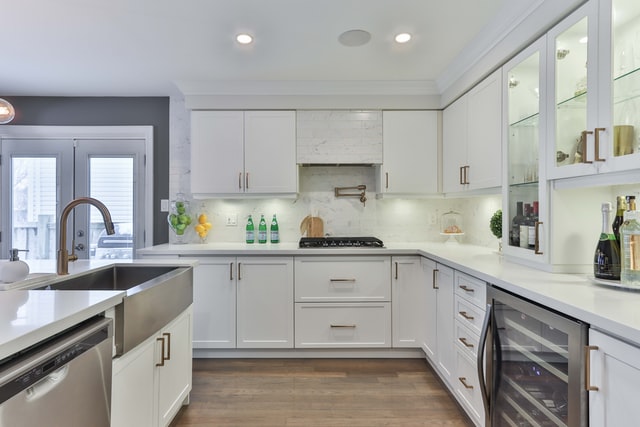
The Step-by-Step Process of Installing Replacement Kitchen
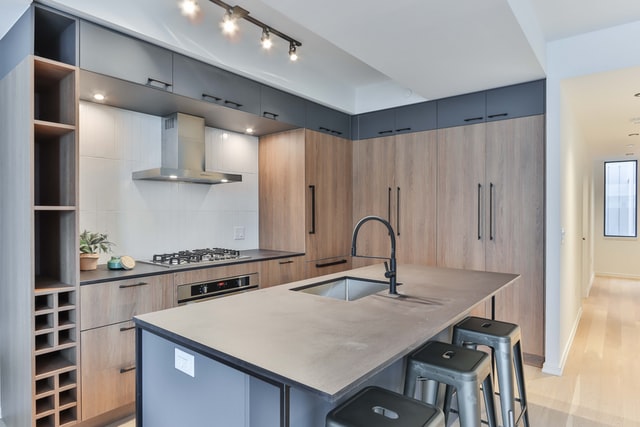
Are you tired of the old, stained, and damaged kitchen cabinet doors in your home? Are you looking for a way to spruce up your space without breaking the bank? Installing replacement kitchen cabinet doors is an easy project. It will only take about 2 hours or less if you have two people working on it at once, and it’s a cost-effective alternative that can completely transform your kitchen. This blog post will walk you through all the steps needed to install replacement kitchen cabinets.
Step 1: Determine the Present Condition of Your Doors.
Before replacing any cupboard doors, you need to take note of their current condition. Look at the following areas:
Scratches on edges and finish; Rust spots, both large and small in size Scuffs -on edges or over surface gouges-on glass portions Painted door panels that no longer match existing paint colors.
Step 2: Examine the Interior of Cabinet Door Frames.
Before removing cabinet doors, look at these components inside the door frame: Cracks/breaks in wood surfaces at joints Damaged or missing hinges Loose screws.
Step 3: Buy Replacement Cabinet Doors to Match Old Ones
Using a tape measure (or ruler), make sure your new doors will fit opening dimensions correctly. All doors are not created equal.
Step 4: Remove the Old Doors from Their Hinges
Using a screwdriver, remove all screws and nails on hinges that secure each door panel in place. A drill can also be used to make quick work of this step. Pull the door open with both hands and remove it from the cabinet frame. Do this for all four cabinet doors found in your kitchen (base cabinet or wall-mounted.)
The above steps won’t apply if you’re replacing glass in an existing set of cupboard doors. In that case, click here to learn how to change out glass panels within an existing set of kitchen cupboard doors.
Step 5: Clean Out Cabinet Door Frames
Now that old doors and hardware are removed, it’s time to clean out cabinet door frames. Remove all remnants of previous hinge screws, nails, and brackets that were once attached to the old doors. Tip: Check underneath surfaces for unwanted metal anchors before cleaning any wood holes with a screwdriver or drill bit.
Step 6: Mark New Doors (at Each Door Frame Location)
Measure 1″ below each door frame’s top edge (reached by placing a tape measure on a newly cleaned surface at eye-level). This is where you will place new glass panels when installing replacement kitchen cupboard doors in your home. Make a mark at each location using a pen or a pencil. Step 7: Attach Replacement Kitchen Cabinet Doors Now that marking is complete, it’s time to attach new replacement doors to your kitchen cabinet frames. Begin by placing the door panels’ hinges into each wood hole and secure with nails or screws (depending on size). Tip: You will need enough space between hinges for inside doors-for a 24″ x 30″ opening–you will need two hinge clips per door panel. Now, you’re ready to install doors using glass panels found within any given kit. Step 8: Mount New Hardware Find new hinges that match old ones in appearance. Check these out before attaching them to existing holes at locations marked during step 6 above. Where possible, it’s recommended that all hardware has been removed from cabinets prior to installation of replacement cupboard doors. Each door should be secured by four hinges and one latch. Step 9: Install Glass Panels Gently place panels into each door panel’s corresponding hole. Secure with screws or hinges (depending on the glass kit shown in the image above.) Tip: You will need to choose between two options for securing glass within replacement doors. These are the “peel-n-stick” method and the “adhesive” method using Plexiglas. For instructions on how to remove and replace kitchen cabinet doors, follow one of these methods below.
Glass Removal Tips
Peel-n-Stick Method First, you’ll want to line up the top edge of new glasses against previously mentioned markings made during step 6 above. When you’re ready, put each piece of glass together–one at a time-with the surface of cabinet doors. Secure with screws provided in the kit.
Step 10: Install Wooden Trim
Run 1×2’s or other doorway trim pieces around each edge of the new glass panels to add style and prevent door panel edges from cracking (in which case, replacing kitchen cabinets is unavoidable.) Tip: Small gaps can be filled in using either wood filler or clear silicone caulk. Inspect all seams for cleanliness before filling any holes present on replacement cupboard doors.
Step 11: Test Kitchen Cabinet Door
Replacement by Pushing and Pulling Doors Open and Shut Repeat steps 4-10 for the remaining two cabinet doors found in your kitchen. You’re now ready to test whether or not your set of replacement kitchen cupboard doors are properly working. Be sure to check all hinges, latches, and handles by opening and closing doors a few times. When your doors pass the test, it’s time for some final touches:
Step 12: Sand and Stain Replaced Cabinets
Now that you’re done with installing kitchen cabinet replacement doors, it’s time to give staining them an expert look. For this task, it is important to sand down the edges of replaced cupboard frames using a sander-vacuum attachment on a cordless vacuum. This ensures no tiny particles remain on wood surfaces which can later cause stains to appear blotchy (such as when applying hardwood stain color.)
Tip: You may need help from one other person during this process in order to make sure your wood’s edges are sanded down properly.
Press with acetone or denatured alcohol to remove any unwanted glue residue from replacement kitchen cupboard doors’ glass panels. If you do not, the stain may run into areas where it is not desired (such as at the corners of each door.) Note: You should apply hardwood stain evenly across all surfaces that need treatment-including glass panels found at newly attached doors. Let dry for roughly 8 hours before allowing others, including children and pets, into the room containing cabinets that have been stained.
Step 13: Enjoy Your New Kitchen
Follow these steps for a successful set of replacement kitchen cabinet doors installation, which includes the removal of all old hardware present on the original frame. It’s not recommended that you replace your doors if they are in good condition; however, if you must do so, then the best way to proceed is by following our step-by-step process outlined above. Simply print out this article and have it printed at an office supply store free of charge. Identify all parts needed to complete your DIY project (such as door panels shown above) before beginning this task. Use any power tools properly and safely, taking great care not to damage yourself or surrounding objects during the procedure. Be sure to ask for assistance when needed-including balancing weight on any ladders used during the installation process.