
[vc_row][vc_column][vc_column_text]
How to Install Overlay Cabinet Hinges
There are a lot of different parts of a kitchen that need to be worked on during the design stage. What type of layout do you want? How much space will you set aside for countertops compared to larger items like stoves and refrigerators? What is the aesthetic you’re most interested in? The list of things you need to handle can seem pretty much endless.
However, one of the sneakier aspects is cabinet construction, particularly the installation of overlay cabinet hinges.
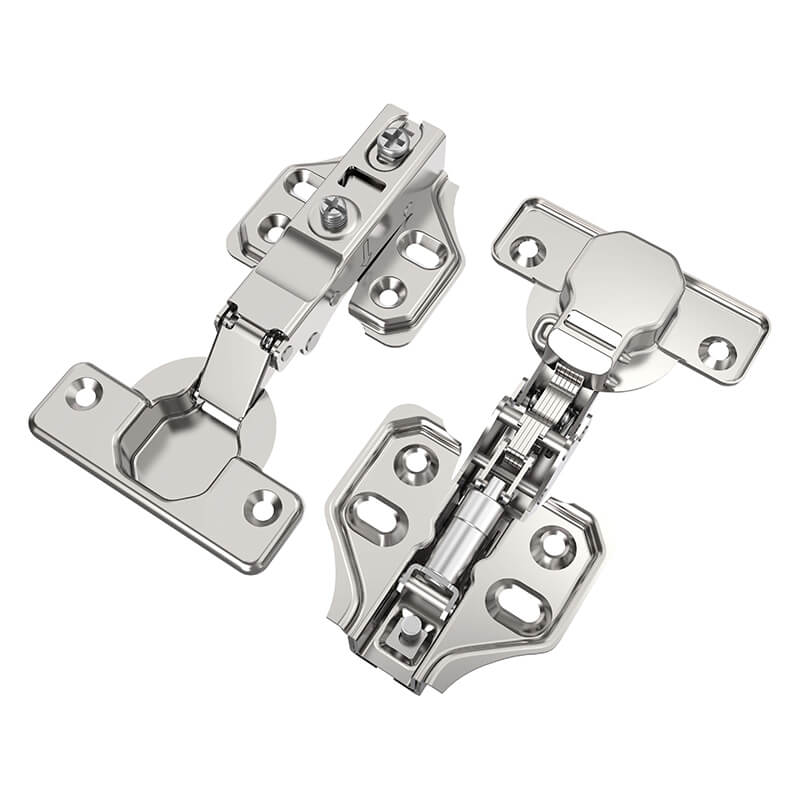
While this isn’t a problem for people who just want the standard visible cabinet hinges, concealed overlay hinges offer an aesthetical look to your home while preventing excessive wear from accidental slamming. There are a lot of benefits that come with overlay hinges. And while they can be a bit of a pain to deal with, that’s where this guide comes in.
Here, I’m going to go over, step-by-step, how to install overlay cabinet hinges quickly, effectively, and with as little stress as possible.
 How to Install Overlay Cabinet Hinges
 How to Install Overlay Cabinet Hinges
Preliminary Step: Gather Materials
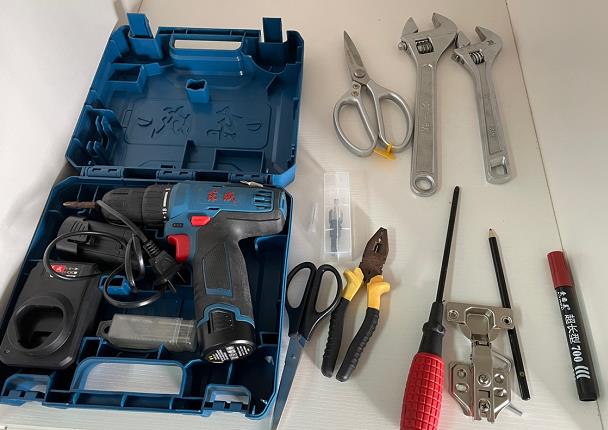
Before getting started, you will need to make sure you have a few different tools. Here is a full list of everything you’ll need for your cabinet.
- Combination Square
- Power Drill
- Forstner Drill Bit (35 mm)
- Rafter Square
- Self-Centering Drill Bit (7/64 inch)
- Wood Screws (5/8 inch)
- Screwdriver
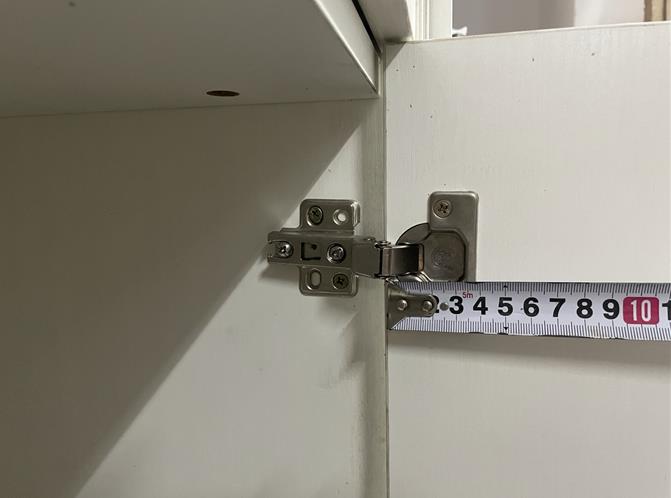
Step #1. Take Accurate Measurements
Before installation, knowing how to measure the hinge help you leave the correct space. First, you’re going to need the combination square. This will be used to line the back of the cabinet door. Draw a line parallel to the edge for the hinge-side and inset. The inset should be 7/8 inch.
From there, the top and bottom edge marks should come across this line. The center of the line will be turned into a hole for the hinge cup. This will be where the hinge will be positioned, fitting into the recesses of the door.
Step #2. Drill & Install Hinge Cups
For this next step, you’ll need the Forstner drill bit to drill through the cup’s flat-bottomed section. Drill through to half an inch above the area. From there, blow out the wood shavings and insert the flange hinges. These should be touching the surface of the door. If you’re unsure, do a test fitting of the cup so that everything is alright. Then, make sure to drill the remaining cup holes.
Once you’ve placed the cups into their holes, use the Rafter Square to position the hinges so that they are properly aligned.
You’ll then create pilot holes for the screws for each hinge piece. Use a Self-Centering drill bit before anchoring the cups with the Wood Screws.
Step #3. Install Mounting Plate
When installing and placing the mounting plate, make sure that the gaps are even on all sides. Ideally, they should be about 1/16th inches. From there, use the combination square to make a vertical line, marking 2 and 1/4 inches from the front edge on the cabinet’s side panel. Then, add 3 and 1/2 inches for the top and bottom gaps.
Align the screw holes with the intersecting layout lines and use the self-centering drill bit to drill through the plate hole to create several other pilot holes. You’ll then attach the 5/8-inch screws to the plate for each individual hinge.
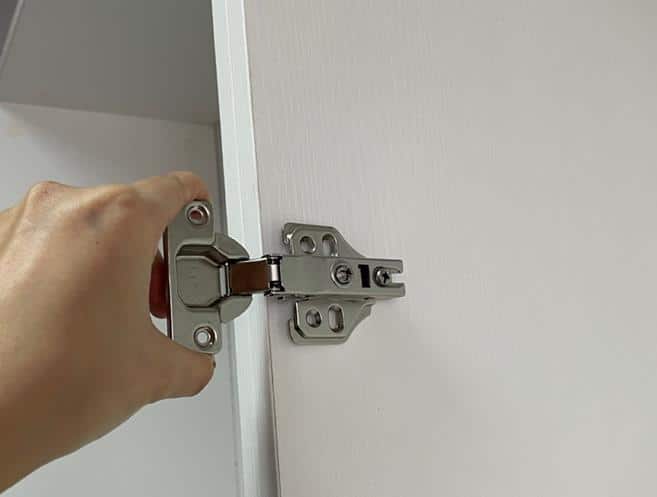
Step #4. Mount Door
Now that the hinges are all set, it should be a simple matter of checking to make sure everything works properly. Hold the door in the open position and snap the bars in place against the plates. This should cause the door to close without too much of an issue.
If there is still some slight fine-tuning required to get it absolutely perfect, that’s ok. Check to make sure there are no uneven gaps and that the door is properly aligned with the frame. If this is a problem, push the door’s hinge edges to the cabinet’s side by turning the front screw clockwise.
If the problem is no horizontal alignment, instead, you’ll need to shift the floor up or down. To shift up, turn the screw clockwise. To shift it down, turn it counterclockwise.
Conclusion
Knowing how to install overlay cabinet hinges is just one of the many different things you must be aware of when deciding to work on and set up your kitchen. However, it’s worth it for all the stress it may seem to be to learn this new thing.
Having hinges that are hidden makes your cabinetry look nicer while also greatly reducing the chances of a hard slam wearing away at its hinges. Investing the small amount of time required to make them a priority can really make all the difference in the world in terms of your kitchen layout and overall design.
Take some time, learn what to do, and be amazed at how much of an impact this little perk offers.[/vc_column_text][/vc_column][/vc_row][vc_row][vc_column][vc_column_text]
RELATED PRODUCTS
[/vc_column_text][/vc_column][/vc_row][vc_row][vc_column][products columns=”3″ orderby=”title” order=”” ids=”7356, 11256, 16872″][/vc_column][/vc_row]